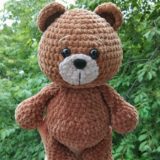
Barsik the cat free crochet pattern

This easy crochet cat free pattern is a great amigurumi project for cat lovers! The legs, body and head are worked in one piece together from the bottom up. So, you don’t need to sew these parts together. The height of finished amigurumi cat is about 14 cm (5.5″) without ears.
Designed and photos by @olesya_amitoys
Translated by Amiguroom Toys
Materials:
- Yarn: YarnArt Jeans (55% cotton, 45% acrylic, 100 g/160 m)
- Hook size: 2.5 mm and 3.0 mm for ears
- Black beads for eyes
- Black thin yarn or embroidery floss for whiskers
- Sewing needle and scissors
- Satin ribbon for a bow
- Fiberfill
Abbreviations:
R = row
mc = magic circle
ch = chain
sl st = slip stitch
sc = single crochet
inc = increase (2 sc in the next stitch)
dec = decrease (single crochet 2 stitches together)
(12) = number of stitches you should have at the end of the round/row
( )*6 = repeat whatever is between the brackets the number of times stated
Free amigurumi cat pattern

Arms (make 2)
R 1: 6 sc in mc (6)
R 2: (inc)*6 (12)
R 3: (3 sc, inc)*3 (15)
R 4-7: 15 sc (4 rows)
R 8: (3 sc, dec)*3 (12)
R 9-10: 12 sc (2 rows)
R 11: (4 sc, dec)*2 (10)
R 12: 10 sc
Fold top of arm flat and sc through both sides across.
F.o. and leave a long tail for sewing.
Ears (make 2)
With 3.0 mm crochet hook:
R 1: 4 sc in mc (4)
R 2: (inc)*4 (8)
R 3: (1 sc, inc)*4 (12)
R 4: (3 sc, inc)*3 (15)
R 5: (4 sc, inc)*3 (18)
R 6: (5 sc, inc)*3 (21)
Don’t stuff.
F.o. and leave a long tail for sewing.
Legs, body and head
Legs (make 2)
R 1: 6 sc in mc (6)
R 2: (inc)*6 (12)
R 3: (3 sc, inc)*3 (15)
R 4-6: 15 sc (3 rows)
F.o.
Don’t cut the yarn when you’ll finish the second leg!
From the second leg: 4 ch, join with the first leg.
Continue crocheting the body in the round:
Stuff as you go.
R 7: 15 sc on the 1st leg, 4 sc in 4 ch, 15 sc on the 2nd leg, 4 sc in 4 ch (opposite side) (38)
R 8: (15 sc, inc, 2 sc, inc)*2 (42)
R 9: (6 sc, inc)*6 (48)
R 10-11: 48 sc (2 rows)
R 12: (7 sc, inc)*6 (54)
R 13-18: 54 sc (6 rows)
R 19: (7 sc, dec)*6 (48)
R 20: 48 sc
R 21: (6 sc, dec)*6 (42)
R 22-23: 42 sc (2 rows)
R 24: (5 sc, dec)*6 (36)
R 25: 36 sc
R 26: (4 sc, dec)*6 (30)
R 27: (3 sc, dec)*6 (24)
R 28: (inc)*24 (48)
R 29: (7 sc, inc)*6 (54)
R 30: (8 sc, inc)*6 (60)
R 31: (9 sc, inc)*6 (66)
R 32-34: 66 sc (3 rows)
R 35: (9 sc, dec)*6 (60)
R 36-37: 60 sc (2 rows)
R 38: (8 sc, dec)*6 (54)
R 39: 54 sc
R 40: (7 sc, dec)*6 (48)
R 41: (6 sc, dec)*6 (42)
R 42: (5 sc, dec)*6 (36)
R 43: (4 sc, dec)*6 (30)
R 44: (3 sc, dec)*6 (24)
R 45: (2 sc, dec)*6 (18)
R 46: (1 sc, dec)*6 (12)
R 47: (dec)*6 (6)
F.o.
Tail
R 1: 6 sc in mc (6)
R 2: (2 sc, inc)*2 (8)
R 3-12: 8 sc (10 rows)
Stuff gently with fiberfill.
Fold top of tail flat and sc through both sides across.
F.o. and leave a long tail for sewing.
Muzzle
Make 6 ch.
Make an oval starting from the 2nd ch from hook, work on both sides of the chain.
R 1: From the 2nd ch from hook: 4 sc, 3 sc in last st, turn and crochet on the opposite side of the chain: 3 sc, inc (12)
R 2: inc, 3 sc, inc, 1 sc, inc, 3 sc, inc, 1 sc, sl st
F.o.
Pull off a little the muzzle in the center as a bow before sewing.
Nose
Make 2 ch, in the 2nd ch from hook: 2 sc.
F.o. and leave a long tail for sewing.
Assembly
Sew on beads for the eyes.
Sew the muzzle, nose and ears to the head.
Sew the arms to the body on R 27.
Sew the tail to the body.
Embroider whiskers using black floss.


There was no instruction as to what color yarn was used for this effect. There are no color change instructions to get this effect. There is no instruction for where to place the ears or the eyes or the arms. The instructions for the tail makes a fat, stumpy (not cat-like) tail. There is no warning to embroider whiskers and place the muzzle and embroider the nose or add the eyes BEFORE stuffing the head. The head that results from this pattern is NOT the shape shown in the photo. It’s just a typical round amigurumi head.
Found this pattern really fun and simple to follow! I’d been looking for the perfect cat pattern for a gift, and I can safely say this one was it the moment I laid eyes on it!
There is, however, a lack of instructions for smaller details. I’ve written some indication in case anyone needs it:
• I used 3mm hook and DK yarn
– sew tail between rounds 13-14
– if you’re using safety eyes, insert them between rounds 35-37 about 5-6 stitches apart
– I opted to embroider a simple T-shape for the nose
– sew ears as you see fit once you’ve finished the head
Hope that helps! And thank you for the free pattern! Can’t wait to use it again!
Is there a video of connecting the 2 legs I’m very confused