Amigurumi tiger with a heart
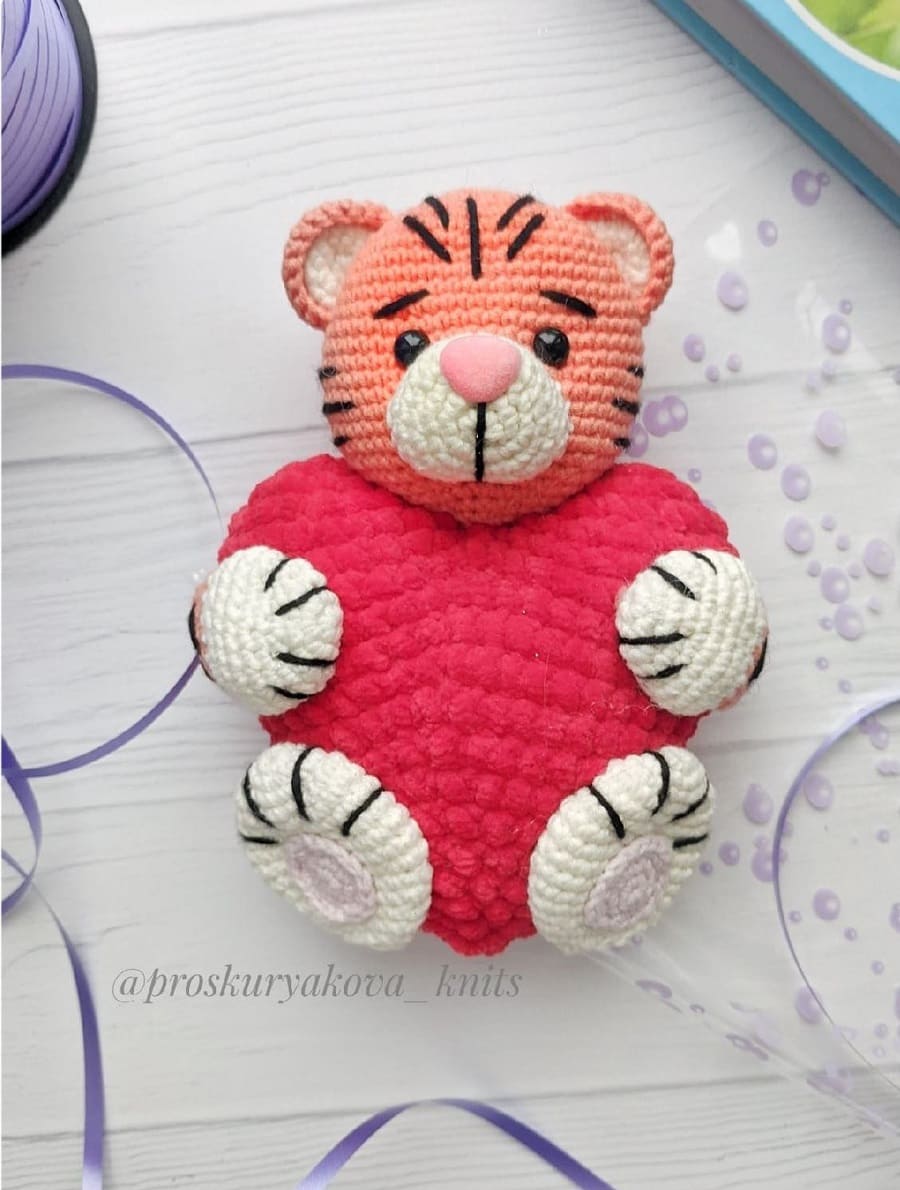
Fall in love with this free crochet Valentine pattern. Use this pattern to create a cute tiger holding a heart. The height of the finished amigurumi tiger with a plush heart is about 18 cm (7″).
Designed and photos by Svetlana Proskuryakova
Instagram: @proskuryakova_knits
Translated by Amiguroom Toys
Materials:
- Himalaya Dolphin Baby yarn, color #80318 red (heart)
- YarnArt Jeans yarn, color # 23 (main color), white (muzzle and paws), black (for stripes)
- 2.0 mm and 3.5 mm for plush yarn
- 8 mm safety eyes
- 14 mm safety nose
- Tapestry needle
- Scissors
- Fiberfill
Abbreviations:
R = row
mc = magic circle
st = stitch
ch = chain
sc = single crochet
inc = 2 sc in the next stitch
dec = single crochet 2 stitches together
F.o. = fasten off
(12) = number of stitches you should have at the end of the round/row
( ) *6 = repeat whatever is between the brackets the number of times stated
You can crochet other amigurumi animal with a heart >> Amigurumi bunny with a heart
Crochet tiger with heart free pattern
Tiger
Legs (make 2)
With white yarn:
R 1: 6 sc in mc (6)
R 2: (inc)*6 (12)
R 3: (1 sc, inc)*6 (18)
R 4: (2 sc, inc)*6 (24)
R 5: 24 sc
R 6: (3 sc, inc) *6 (30)
R 7-10: 30 sc (4 rows)
R 11: (3 sc, dec) *6 (24)
R 12: 24 sc
R 13: (2 sc, dec) *6 (18)
R 14: 18 sc
R 15: (1 sc, dec) *6 (12)
R 16: (dec)*6 (6)
Stuff gently with fiberfill.
F.o.
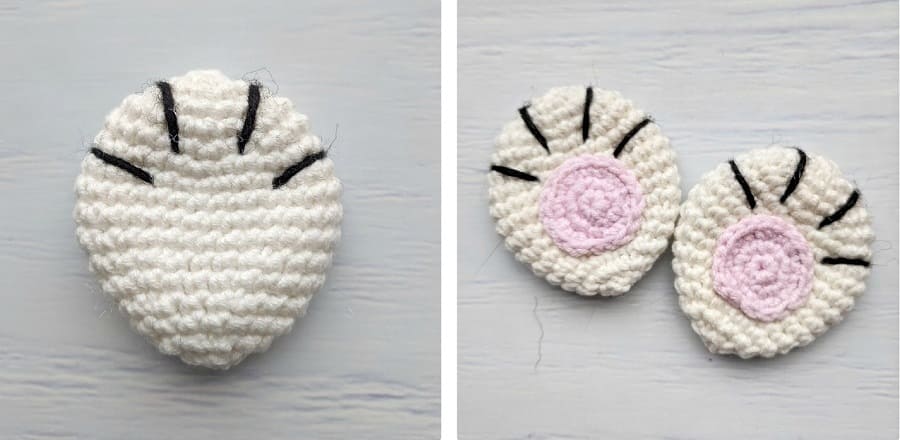
Paw pads (make 2)
With pink yarn:
R 1: 6 sc in mc (6)
R 2: (inc)*6 (12)
R 3: (1 sc, inc)*6 (18)
F.o. and leave a long tail for sewing.
Sew paw pad on the leg.
Embroider paws with black yarn.
Arms (make 2)
With white yarn:
R 1: 6 sc in mc (6)
R 2: (inc)*6 (12)
R 3: (1 sc, inc)*6 (18)
R 4-5: 18 sc (2 rows)
R 6: (2 sc, inc) *6 (24)
R 7-8: 24 sc (2 rows)
R 9: (2 sc, dec) *6 (18)
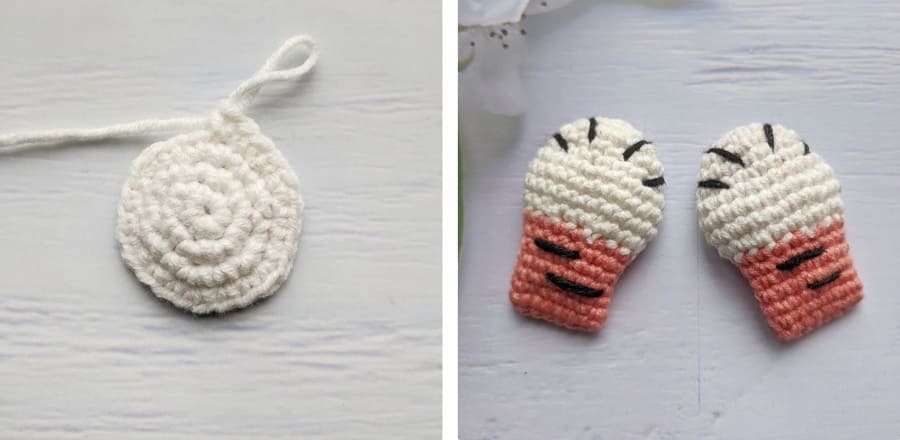
Change to orange yarn:
R 10: (4 sc, dec) *3 (15)
R 11-15: 15 sc (5 rows)
Stuff only the bottom part of the arm.
Fold top of arm flat and sc through both sides across.
Embroider paws and stripes with black yarn.
Muzzle
R 1: 6 sc in mc (6)
R 2: (inc)*6 (12)
R 3: (1 sc, inc)*6 (18)
R 4: (2 sc, inc)*6 (24)
R 5: 24 sc
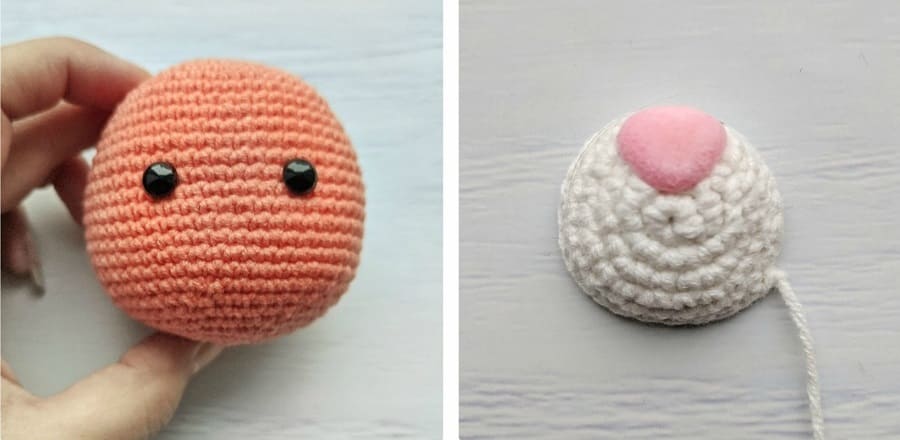
F.o. and leave a long tail for sewing.
Insert safety nose in two rows below the center.
Head
Stuff as you go.
R 1: 6 sc in mc (6)
R 2: (inc)*6 (12)
R 3: (1 sc, inc)*6 (18)
R 4: (2 sc, inc)*6 (24)
R 5: (3 sc, inc) *6 (30)
R 6: (4 sc, inc) *6 (36)
R 7: (5 sc, inc) *6 (42)
R 8: (6 sc, inc) *6 (48)
R 9-10: 48 sc (2 rows)
R 11: (7 sc, inc) *6 (54)
R 12-20: 54 sc (9 rows)
Insert safety eyes between R 14 and R 15 at the distance of 6 st from each other.
R 21: (7 sc, dec) *6 (48)
R 22: (6 sc, dec) *6 (42)
R 23: (5 sc, dec) *6 (36)
R 24: (4 sc, dec) *6 (30)
R 25: (3 sc, dec) *6 (24)
R 26: (2 sc, dec) *6 (18)
R 27: (1 sc, dec) *6 (12)
R 28: (dec) *6
F.o.
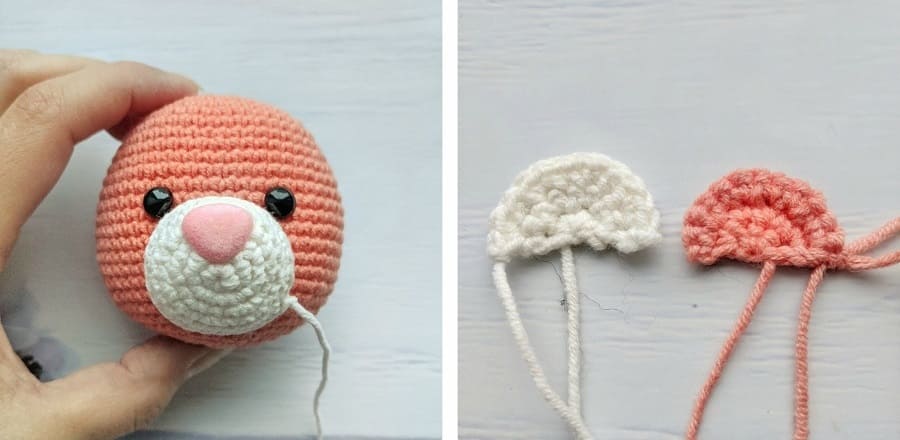
Ears (make 2)
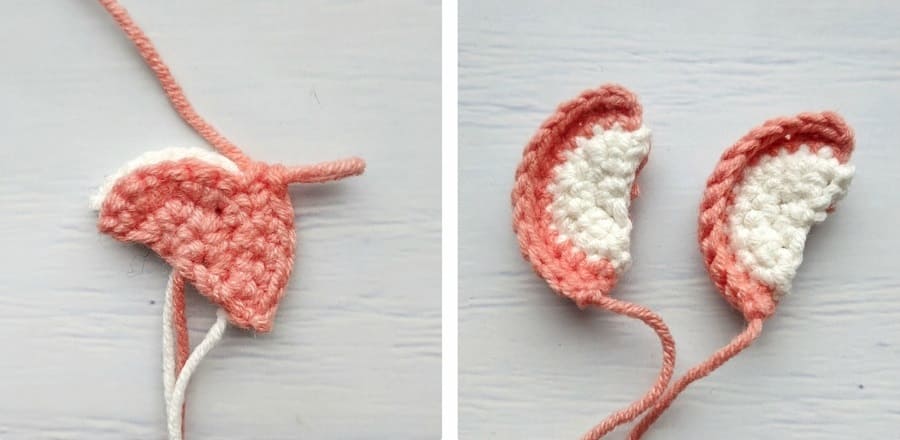
Part 1
With white yarn in turning rows:
R 1: 4 sc in mc, 1 turning chain (4)
R 2: (inc) *4, 1 turning chain (8)
R 3: (1 sc, inc) *4 (12)
F.o.
Part 2
With orange yarn in turning rows:
R 1: 4 sc in mc, 1 turning chain (4)
R 2: (inc) *4, 1 turning chain (8)
R 3: (1 sc, onc) *4 (12)
Don’t cut the yarn!
Fold together part #1 and part #2, turn with orange side to yourself.
R 4: 12 sc
Turn the work.
R 5: 12 sl st
F.o. and leave a long tail for sewing.
Heart
Stuff as you go.
Make 2 details:
R 1: 6 sc in mc (6)
R 2: (inc)*6 (12)
R 3: (1 sc, inc)*6 (18)
R 4: (2 sc, inc)*6 (24)
F.o
Don’t cut the yarn when you will finish the second detail.

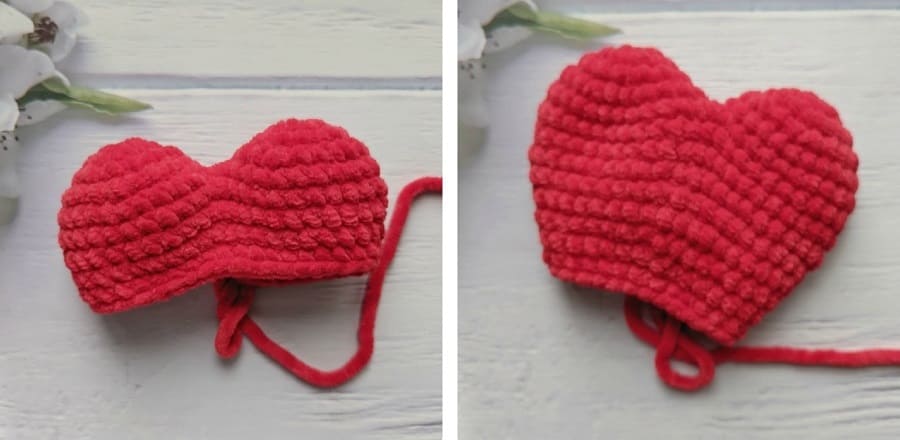
Join two details together:
R 5: 24 sc on the 1st detail, 24 sc on the 2nd detail (48)
R 6: 48 sc
R 7: 10 sc, dec, 22 sc, dec, 12 sc (46)
R 8: (21 sc, dec) *2 (44)
R 9: (9 sc, dec) *4 (40)
R 10: 8 sc, dec, 18 sc, dec, 10 sc, dec (38)
R 11: (17 sc, dec) *2 (36)
R 12: (7 sc, dec) *4 (32)
R 13: (6 sc, dec) *4 (28)
R 14: (5 sc, dec) *4 (24)
Stuff with fiberfill.
R 15: (4 sc, dec) *4 (20)
R 16: (3 sc, dec) *4 (16)
R 17: (2 sc, dec) *4 (12)
R 18: (1 sc, dec) *4 (8)
R 19: (dec) *4 (4)
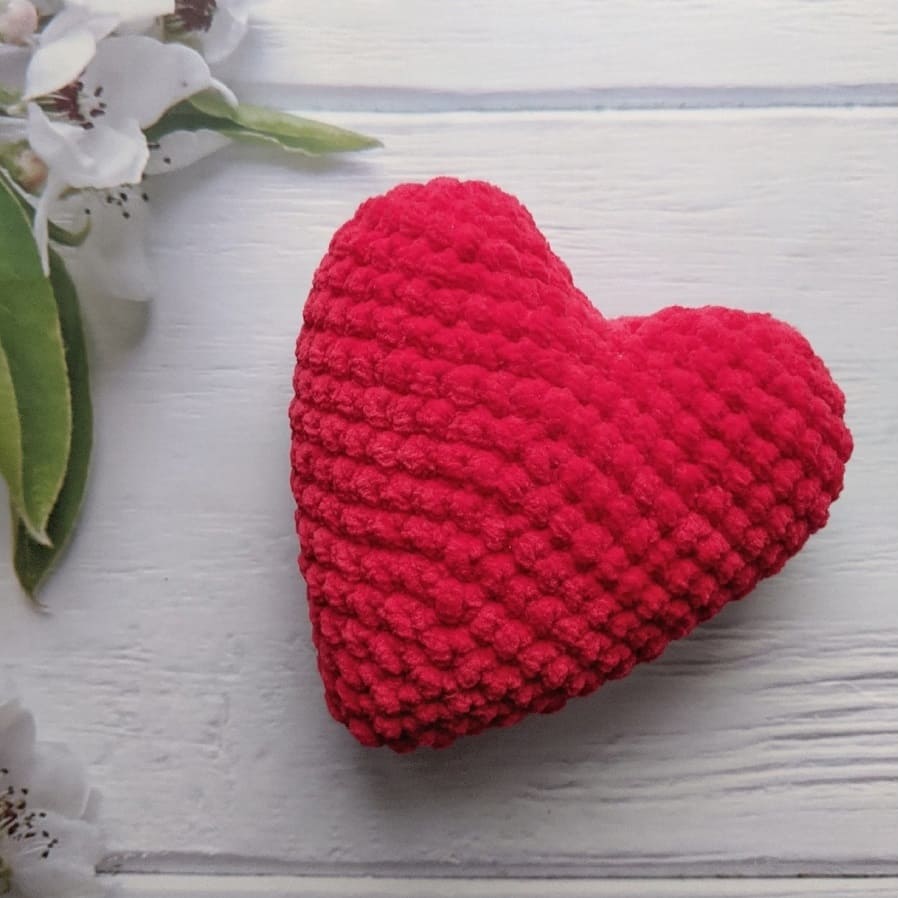
F.o.
Assembly
1. Sew muzzle under eyes between R 25 and R 16. Put some stuffing inside the muzzle before you finish.
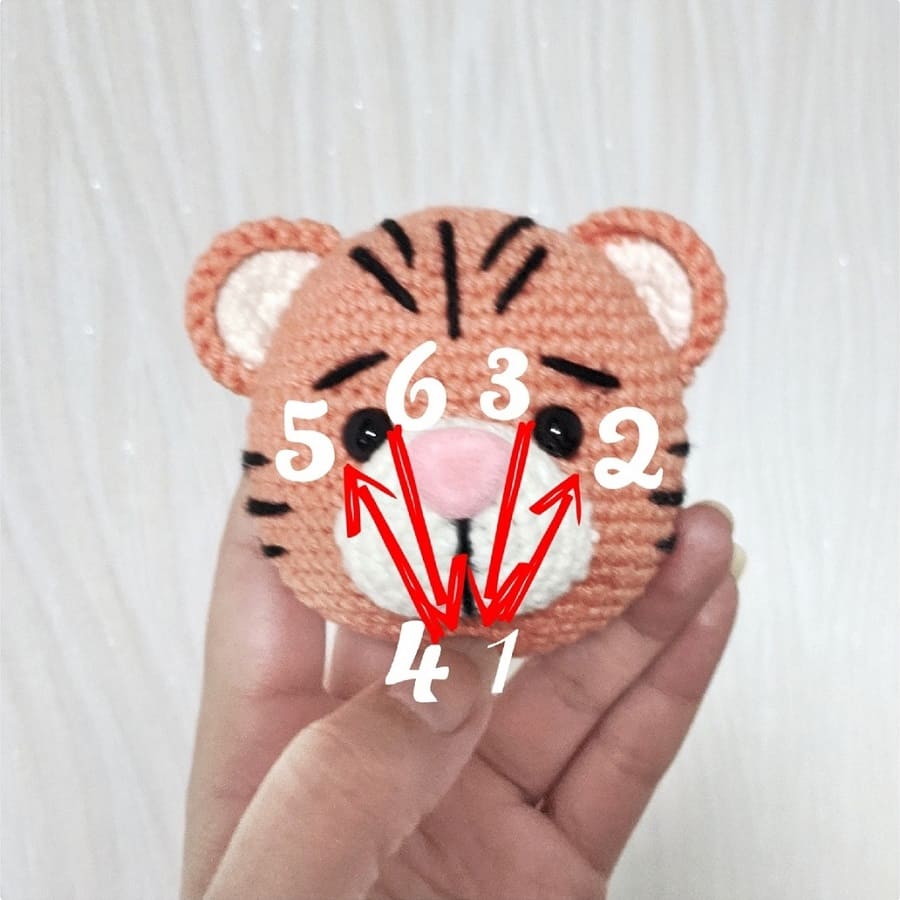 2. Take a long needle with thread, make a knot at the end of the thread.
Insert the needle from the point #1 and draw it out the point #2, than insert the needle in the point #3 and draw it out the point #1. Skip one stitch left and insert the needle in the point #4 and draw it out the point #5, than insert the needle in the point #6 and draw it out the point #4. Pull slightly.
Repeat one time more. F.o.
3. Sew ears on the head. Start on R 5-6 of the head.
4. Embroider stripes on the head, eyebrows and muzzle with black yarn.
5. Sew head, arms and legs to the heart.


