Little goose amigurumi free pattern

Learn how to crochet a cute goose with this free goose amigurumi pattern. This easy-to-follow crochet goose pattern is made using Alize Softy Plus, a fantasy yarn, and a 3.5 mm crochet hook, making it perfect for creating a soft and cuddly amigurumi goose toy. The head and body are crocheted in one piece, while the feet and beak are sewn on separately. The finished size of your crochet goose bird will vary depending on the yarn, hook size, and your tension.
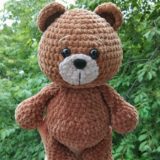
Designed and photos by @letim_toys
Translated by Amiguroom Toys
Materials:
- Yarn: Alize Softy Plus or Saltera Soft (but crochet a little more loosely when using Saltera yarn). You can also use any plush yarn that is 100 g/ 120 m.
- Hook size: 3.5 mm
- For the feet and beak: YarnArt Jeans yarn #84 and a 2.0 mm crochet hook
- Black embroidery floss
- Scissors
- Tapestry needle
- Stitch markers
- Sewing pins
- Fiberfill
Abbreviations:
R = row
mc = magic circle (magic ring)
sl st = slip stitch
sc = single crochet
inc = 2 sc in the next stitch
dec = single crochet 2 stitches together
F. o. = finish off
(12) = number of stitches you should have at the end of the round/row
(…)* 6 = repeat whatever is between the brackets the number of times stated
Free amigurumi goose crochet pattern

Head and body (one piece)
R 1: 6 sc in mc (6)
R 2: (inc)* 6 (12)
R 3: (1 sc, inc)* 6 (18)
R 4: (2 sc, inc)* 6 (24)
R 5: (3 sc, inc)* 6 (30)
R 6: (4 sc, inc)* 6 (36)
R 7: (5 sc, inc)* 6 (42)
R 8: (6 sc, inc)* 6 (48)
R 9: (7 sc, inc)* 6 (54)
R 10: 54 sc
R 11: 38 sc, 2 inc, 14 sc (56)
R 12: 39 sc, 2 inc, 15 sc (58)
R 13: dec, 20 sc, dec, 5 sc, dec, 5 sc, 2 dec, 2 inc, 2 dec, 5 sc, dec, 5 sc (52)
R 14: 24 sc


Insert the hook into the loop marked with a stitch marker, thereby connecting the two parts of the crocheted fabric.


Now we will crochet the neck:
R 15 (6 sc, dec)* 3 (21)
R 16: 21 sc
R 17: (5 sc, dec)* 3 (18)
R 18-22: 18 sc (5 rows)
R 23-24: 9 sc, 5 sl st, 4 sc (2 rows)
The slip stitches in rows 23 and 24 should be centered at the front of the neck.
Stuff the neck as you work.
R 25: 18 sc
R 26: (2 sc, inc)* 6 (24)
R 27-28: 24 sc (2 rows)
R 29: (2 sc, dec)* 6 (18)
R 30: (1 sc, dec)* 6 (12)
R 31: (dec)* 6 (6)
Thread the yarn tail onto a needle and weave it through the front loops only to close the opening.
Stuff the remaining part of the toy. Take a new length of yarn and sew the back of the goose closed, working through both loops.


Beak
R 1: 6 sc in mc (6)
R 2: (1 sc, inc)* 3 (9)
R 3: (2 sc, inc)* 3 (12)
R 4: 12 sc
R 5: (3 sc, inc)* 3 (15)
R 6: 7 sc, 3 sc in one stitch, 7 sc (17)
F. o. and leave a long tail for sewing.


Feet (make 2)
R 1: 6 sc in mc (6)
R 2: (inc)* 6 (12)
R 3: (1 sc, inc)* 6 (18)
R 4-5: 18 sc (2 rows)
R 6: (4 sc, dec)* 3 (15)
R 7: 15 sc
R 8: (3 sc, dec)* 3 (12)
R 9: 12 sc
R 10: (dec)* 6 (6)
Fold top of foot flat and 3 sc through both sides across.
F. o. and leave a long tail for sewing.
Assembly and finishing
Attach the feet and beak to the goose, secure them with sewing pins, and sew them in place.


Using two strands of black embroidery floss, embroider the eyes.
You can tie a ribbon around the toy’s neck or crochet a collar.