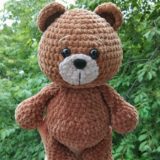
Free crochet Toothless amigurumi pattern

Here is a free crochet pattern for a cute plush Toothless dragon the Night Fury amigurumi. Legs and body are worked in one piece together. Arms are attached with single crochet as you make the body. Other parts are worked separately and attached with sewing. When crocheting from the recommended yarn, the Toothless dragon toy turns out to be about 21-22 cm (8.5″) tall.
Designed and photos by @keti.amigurumi
Translated by Amiguroom Toys
Materials:
- Yarn: YarnArt Dolce Baby (100% polyester; 50 g/85 m)
- Hook size: 3.25 mm (I used Clover hook)
- 18-20 mm safety eyes
- A little yellow cotton yarn for a nose
- Tapestry needle
- Stitch markers
- Sewing pins
- Scissors
- Fiberfill
Abbreviations:
R = row
mc = magic circle
ch = chain
st = stitch
sc = single crochet
dc = double crochet
hdc = half double crochet
inc = increase (2 sc in the next stitch)
dec = decrease (single crochet 2 stitches together)
F. o. = finish off
(12) = number of stitches you should have at the end of the round/row
( ) * 7 = repeat whatever is between the brackets the number of times stated
Free crochet Toothless dragon the Night Fury pattern

Head
R 1: 7 sc in mc (7)
R 2: (inc) * 7 (14)
R 3: (1 sc, inc) * 7 (21)
R 4: (2 sc, inc) * 7 (28)
R 5: (3 sc, inc) * 7 (35)
R 6: (4 sc, inc) * 7 (42)
R 7: (5 sc, inc) * 7 (49)
R 8-18: 49 sc (11 rows)
Insert safety eyes between R 14 and R 15 at the distance of 7 st from each other.
R 19: (5 sc‚ dec) * 7 (42)
R 20: (4 sc, dec) * 7 (35)
R 21: (3 sc‚ dec) * 7 (28)
R 22: (2 sc, dec) * 7 (21)
R 23: (5 sc, dec) * 3 (18)
F. o.
Arms (make 2)
R 1: 6 sc in mc (6)
R 2: (inc) * 6 (12)
R 3-4: 14 sc (2 rows)
R 5: 2 dec, 8 sc (10)
R 6-14: 10 sc (9 rows)
Stuff ½ full.
F. o.
Legs and body (one piece)
Legs (make 2)
R 1: 6 sc in mc (6)
R 2: (inc) * 6 (12)
R 3: (1 sc, inc) * 3, 6 sc (15)
R 4-7: 15 sc (4 rows)
F. o.
Don’t cut the yarn when you’ll finish the second leg!
From the second leg: 4 ch, join with the first leg (38)
Continue crocheting the body in the round:
R 1: 4 sc, inc, 2 sc, inc, 16 sc, inc, 2 sc, inc, 10 sc (42)
R 2-7: 42 sc (6 rows)
R 8: (5 sc, dec) * 6 (36)
R 9: 36 sc
R 10: (4 sc, dec) * 6 (30)
R 11-12: 30 sc (2 rows)
R 13: (3 sc, dec) * 6 (24)
R 14: 24 sc
R 15: (2 sc, dec) * 6 (18)
R 16: Attach arms on the sides of the body (crochet sc of the body together with sc of the arm) – 18 sc
R 17: 18 sc
F. o. and leave a long tail for sewing.

Ears (make 2)
R 1: 6 sc in mc (6)
R 2: (1 sc, inc) * 3 (9)
R 3: (2 sc, inc) * 3 (12)
R 4: 12 sc
R 5: (3 sc, inc) * 3 (15)
R 6: 15 sc
R 7: (3 sc, dec) * 3 (12)
R 8: 12 sc
Fold top of the ear and sc through both sides across.
F. o. and leave a long tail for sewing.
Horns (make 2)
R 1: 8 sc in mc (8)
R 2-4: 8 sc (3 rows)
F. o. and leave a long tail for sewing.
Side horns (make 2)
R 1: 8 sc in mc (8)
R 2-4: 8 sc (3 rows)
Fold top of the side horn and sc through both sides across.
F. o. and leave a long tail for sewing.
Tail
R 1: 6 sc in mc (6)
R 2: (1 sc, inc) * 3 (9)
R 3-5: 9 sc (3 rows)
R 6: 4 sc, inc, 4 sc (10)
R 7: 10 sc
R 8: (3 sc, inc) * 2, 2 sc (12)
R 9-10: 12 sc (2 rows)
R 11: (5 sc, inc) * 2 (14)
R 12-14: 14 sc (3 rows)
R 15: (6 sc, inc) * 2 (16)
R 17-30: 16 sc (14 rows)
Stuff lightly.
Fold top of the tail and sc through both sides across.
F. o. and leave a long tail for sewing.


Tailfins (one black, other one red)
Insert hook in R 7 of the tail and work towards the tip of the tail.
1: 3 ch, 1 dc
2: 3 ch, 1 dc
3: 3 ch, 1 dc
4: 3 ch, 1 hdc
5: 3 ch, 1 hdc
6: 2 sc
7: 1 sc
F. o.
Crochet the second side in the same way.
Wings (make 2)
R 1: 7 sc in mc (7)
R 2: (inc) * 7 (14)
R 3: (1 sc, inc) * 7 (21)
R 4: (2 sc, inc) * 7 (28)
R 5: (3 sc, inc) * 7 (35)
R 6: (4 sc, inc) * 7 (42)
R 7: (5 sc, inc) * 7 (49)
R 8: (6 sc, inc) * 7 (56)
R 9: (7 sc, inc) * 7 (63)
Fold wing flat and crochet along through both sides: 3 sc, (1 dc, 2 ch, 1 dc – in one stitch) repeat to the end.
F. o. and leave a long tail for sewing.


Assembly
- Sew the head to the body.
- Sew the ears and horns on the head (see at the photos).
- Make eye tightening.
- Embroider a nose with a yellow cotton yarn.
- Sew the wings onto the back of the body.
- Sew the tail onto the back of the body and secure the yarn.